

Tip: If you are not seeing the quick links, make sure that your quick links option is enabled. It is enabled when the slider option is moved to the right, as shown in the above image.
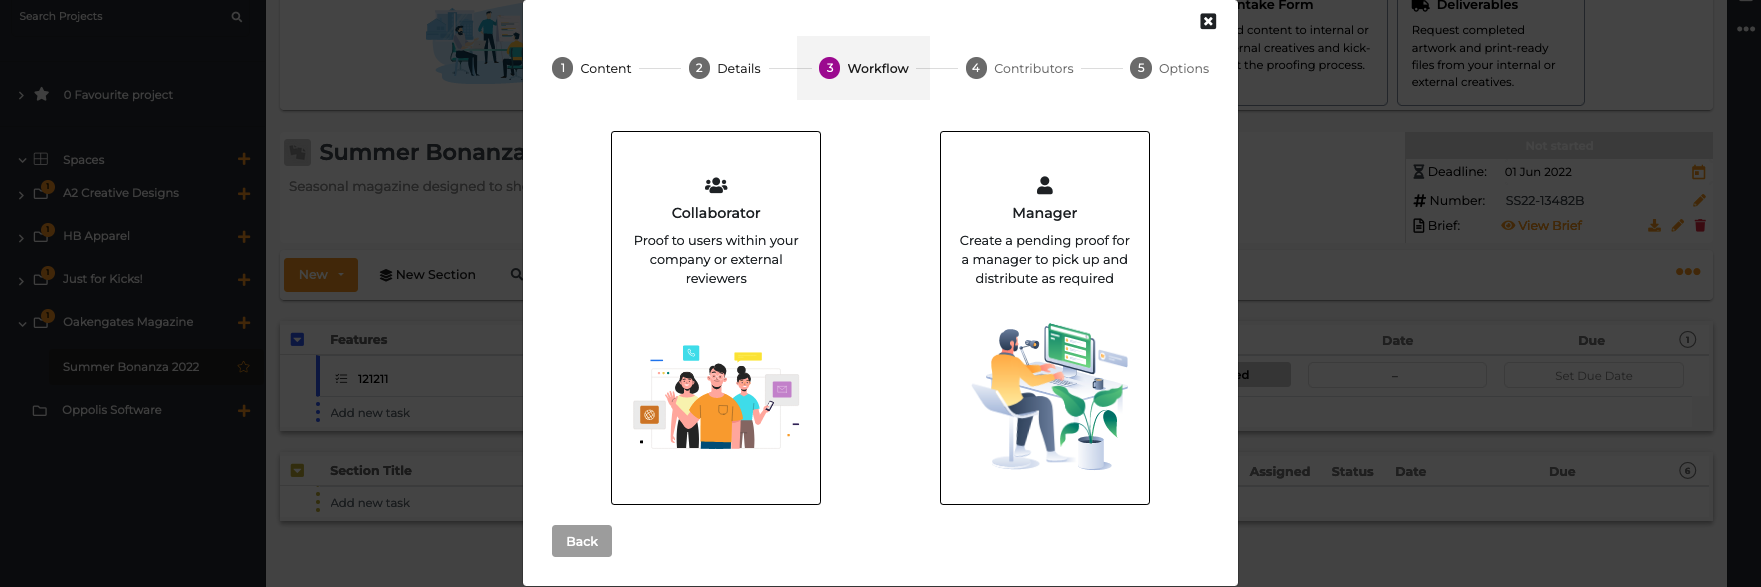
Tip: Select the Collaborator workflow if you are sending the proof directly to the clients or your reviewers. If you need to send the proof to a Project Manager, Leader or Administrator first before it reaches the clients or your reviewers, select the Manager workflow.
Select your Contributors from the provided list or enter their email in the field provided. Make sure to select the appropriate role for your collaborator and click Next.
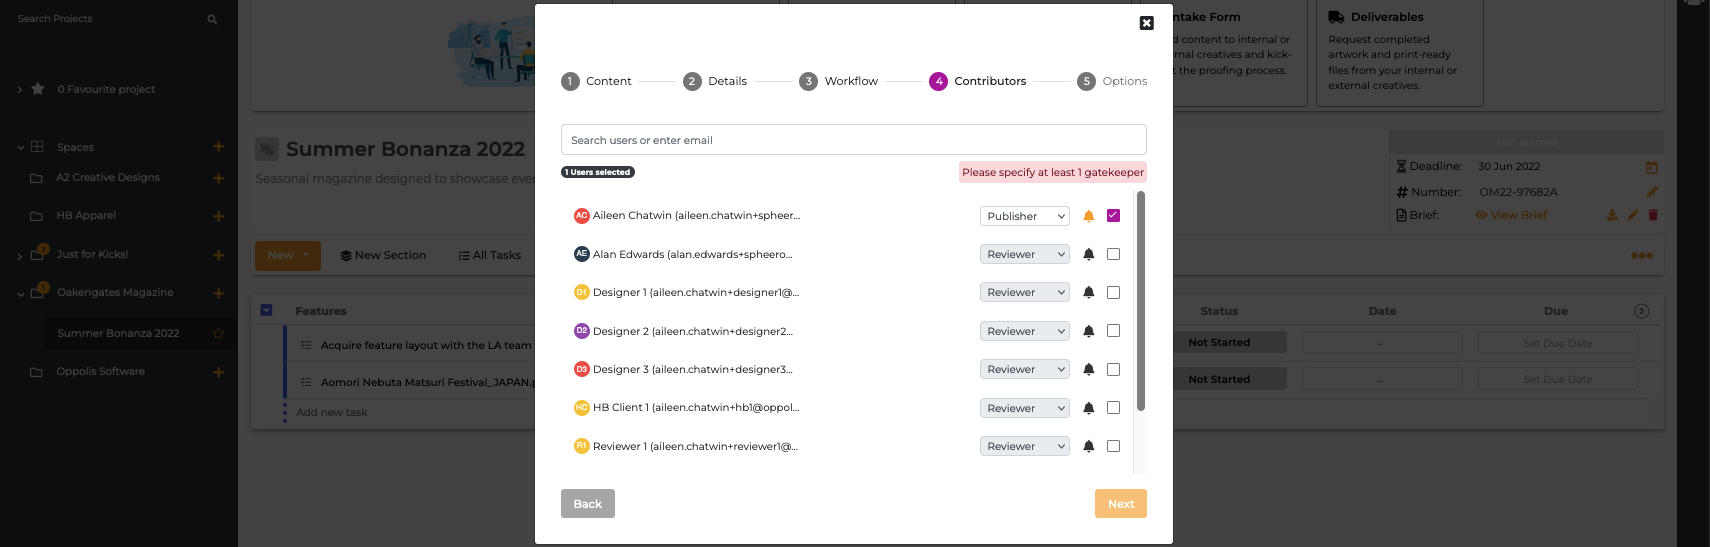
Tip: A proof sender is usually a designer/creative and by default, it is assigned the Publisher role. A collaborator can be assigned any of these roles: As a Reviewer, they are able to add their comments and feedback to a proof, as a Gatekeeper, they are like Reviewers but with more responsibilities. They are the last person in the workflow responsible for sending the proof back to the Publishers to request amendments or sign proofs off the proof once they are happy with them, and as an Observer, they have no option to add any comments or feedback to a proof but can see what is happening to it.
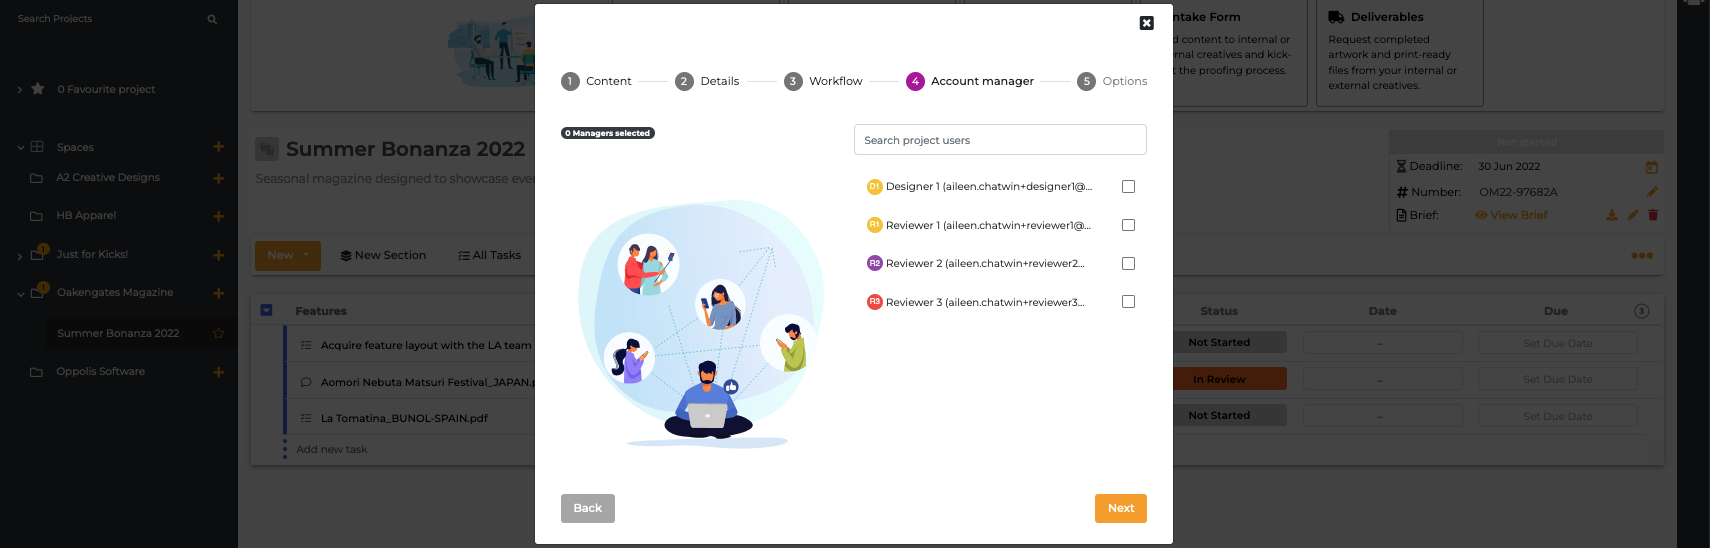
Select your Manager(s) from the provided list and click Next.
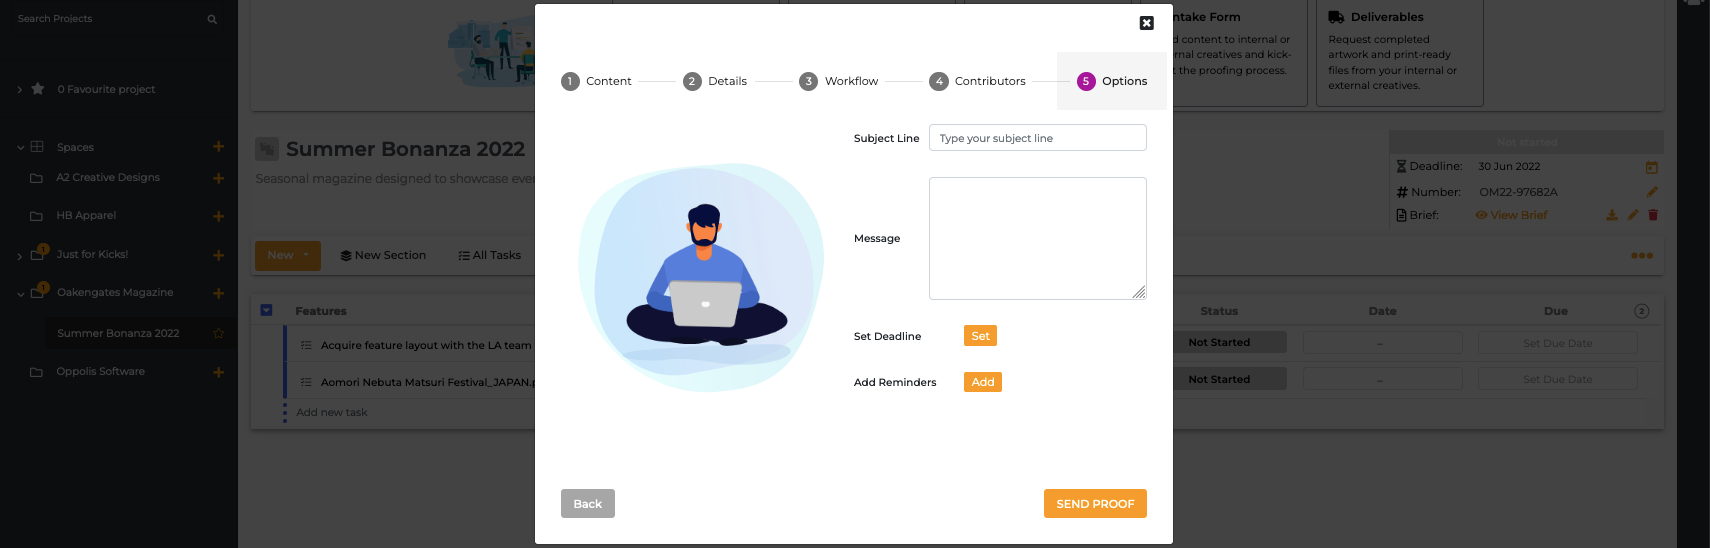
Tip: When adding a deadline to the proof, you will be given the following options: Leave Review Open which allows contributors to continue adding comments to the proof even after the deadline has passed, Request Changes which ends the review round, no new comments can be added and the proof is returned to the designer automatically to make and amends or Sign Off which ends the review round, no new comments can be added and the proof is returned to the designer automatically as finished and no amends are required.
Once the proof has been sent, it will appear in the Section with the following proof status: In Review if sent directly to reviewers or Pending Review if sent to Managers.
